Smart Door Locks and the Spousal Acceptance Factor

The Spousal Acceptance Factor is one of the most critical metrics to a successful smart home deployment. In most families, there is one person pushing for connected or smart devices, and one who by default becomes the consumer. I have found that my wife is the best gauge of a successful product, she just wants things to work as advertised, where I am more forgiving and willing to test products.

Purchasing a smart door lock was a bit of a challenge for us since the requirements were pretty stringent.

  1. Must have an analog failover, a key to access incase of failure.
  2. Must be a classic design, nothing that looks like it is futuristic.
  3. Must integrate with existing alarm system (this one was mine)
  4. A keypad would be a huge bonus since it allows for keyless entry without a phone or other device.
  5. Homekit integration would be a huge bonus.

Basically we wanted something that integrated with our home, and our security system. As we had previously chosen the Ring Alarm System, I started looking at devices which were certified to work with Ring. This shortened the list significantly, as did the design ascetics. The keypad helped to narrow the field, as did the key requirement.

The final product selected was the Schlage Encode Smart WiFi deadbolt. This met all the criteria above, with the exception of homekit integration. The lack of homekit integration was an acceptable compromise since the system was tied directly into the Ring Alarm.

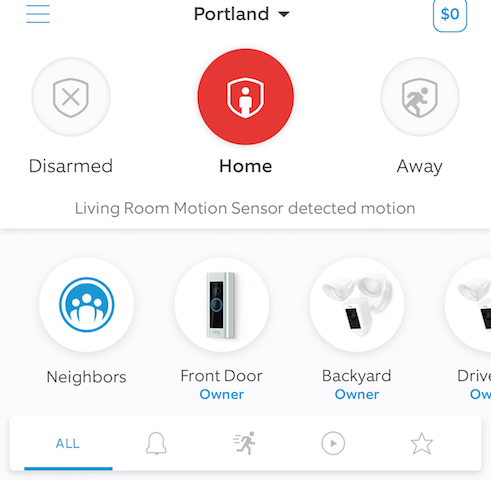
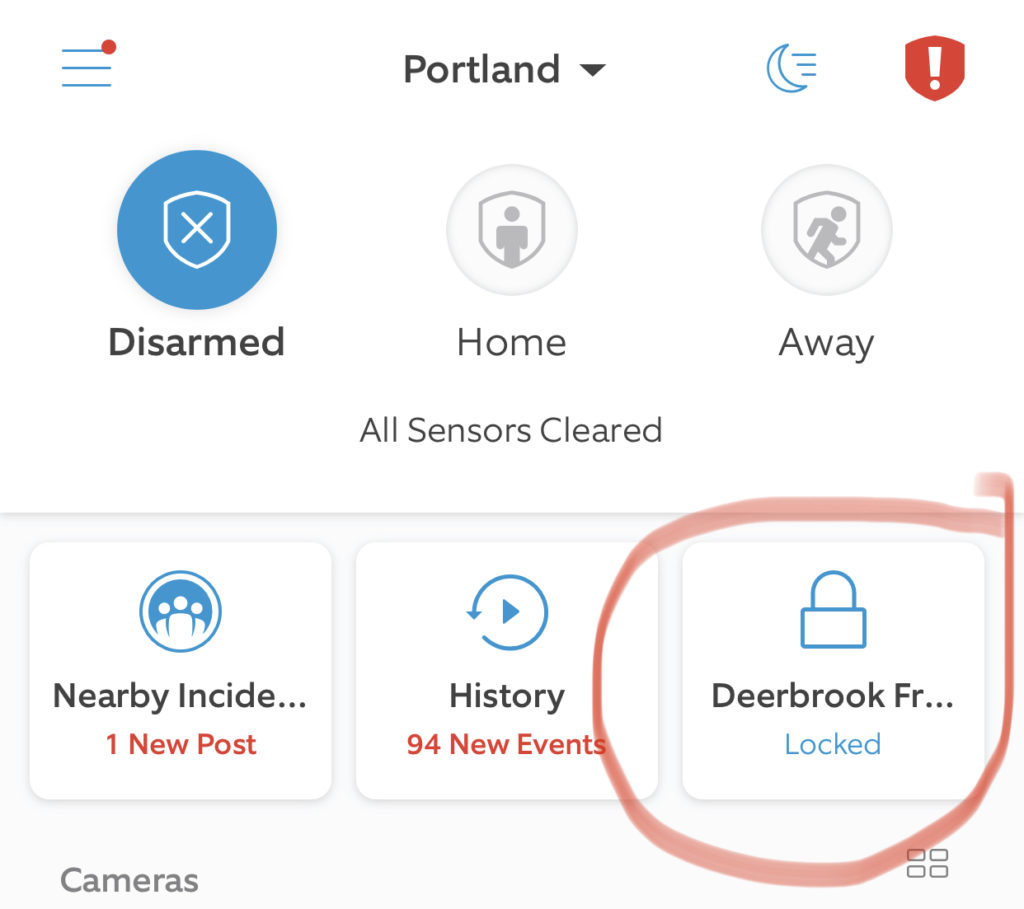
The install took about 15 min since I was replacing the existing deadbolt, and programming was very straight forward. Because I chose the wifi edition, it did require connecting to ring through the amazon key app, something I don’t intend to use for my deliveries. Once I had completed this, I was excited to see the lock show up within the Ring App as below.


This lock has lead to more conversations, we will be putting in the same lock to the door from the garage to the house, and some lower end locks for internal security needs. This has been a surprising success, and a solution I would recommend for anyone wanting to make their home more secure and easier to access for authorized members.

Smart Door Locks and the Spousal Acceptance Factor

Ring Alarm more value than competitors but…

In the Fall of 2017, when Ring announced their Protect system, I immediately pre-ordered.  There had been some break ins in our neighborhood, and my wife was a little concerned due to my crazy work travel schedule.  Due to the lawsuit, my order was postponed until Spring 2018 when it was re-released as the Ring Alarm.

Implementing the Ring Alarm was quite honestly disappointing, much like their cameras, in the sense that it was too simple to configure.  I have never touched an alarm system, and I had the entire thing operational in a matter of minutes.

I ordered the base kit, which comes with a base station, a keypad, a motion sensor, and 2 contact sensors, a z-wave extender, and one extra contact sensor.  My wife and I agreed that we would put sensors on all exterior doors and a motion sensor in the living room since there were two large windows.  As a ring protect plus annual member, I receive 10% off all orders, so the entire order was $198 for a full security system.  The best part was that because I already subscribe to the ring protect plus plan, the professional monitoring service was included.

Setup consisted of connecting the base station to my network.  I initially opted for wireless, but I anticipate moving it to a wired network connection.  The sensors and keypad connect over z-wave to the base station.  I did have one issue with setting up two of the sensors for some reason, which required a brief chat session from within the ring app.  A few minutes into the support session, the tech had me do a simple factory reset, and voila, the sensors suddenly connected.

For a user experience, Ring did an exceptional job.  The Ring app becomes the central management point.  My wife really wanted a way to disarm without the app, so the keypad mounted near the front door is perfect.  For me, I love that I can disarm directly from the app before opening the door.  If I forget, it will alert me on my phone and I can simply click it and disarm.

IMG_2871.jpg


Adding a new user is as simple as it is on the camera system.  It is incredibly nice to choose to add alarm users, or share specific cameras.  From a user experience perspective, the entire system ties together seamlessly.

IMG_2872.jpg


Which brings me to the one thing that I would like to see improved.  I have 3 floodlight cams, a doorbell, and a spotlight cam.  I would love to be able to opt one or more of them in as motion sensors.  I would also like the alarm to sound the camera alarms, to get more visibility in the event of a break in.

All in all, I would absolutely recommend the Ring Alarm.  For the price, and the simplicity of implementation, it is exceptional, and makes the entire Ring system even more valuable.  It doesn’t hurt that I am able to stick it to ADT and their highly overpriced system.  Not today ADT, not today.

IMG_2234.PNG

Ring Alarm more value than competitors but…

Amplifi Teleport getting better but…


I love testing new products, especially when they come from companies I know.  When Amplifi announced their Teleport product as a kickstarter, I immediately backed it.  The premise is essentially to create a virtual connection from wherever you are, a hotel, a coffee shop, etc, back to your home network.  Since I travel for work often, and regularly need to access my home network, this seemed like a great idea.  I often travel with multiple devices, and it is always nice to be able to keep them on the home network while I am gone.

My first impressions were good, the setup was pretty simple, I am familiar with their products, so I set up the router.  Because I have not had a great experience with Amplifi Mesh in my home, I chose to add the new router in bridge mode, basically passing through the network with a hidden network so I can keep the connection to the main network going.  The challenge was setting up the remote device.  Because it requires a separate public IP address, I had to do some crazy gyrations using my cell phone as a hotspot to set it up.  Thankfully the wizard was very straight forward and I didn’t have any real issues with it.

When I went to use it, I was a little annoyed that I would have to set the device up each time from the remote location, and then connect to the hotel guest wifi with my phone to manage the home amplifi device, and enable the pairing.  Clearly a great security move, but not really functional.  I have noticed that an update has changed this, I can simply connect to the remote amplifi device wireless and give it the hotel guest wifi, it then handles authentication between devices.

I tested the device fairly extensively across the U.S. and even in Canada, with mixed results.  In fairness to the product, the latency between my house and the hotels I have been in are largely to blame for the performance issues, but I have generally found that it creates an unacceptable performance lag.  I have a VPN set up to my firewall which performs far better, and is accessible on each of my devices, and the performance is far better.

Overall the product works well, provided you have solid low latency networks underlying.  The use cases are fairly limited though, and I am not sure I would purchase the product again.  If there were a way to better prioritize traffic on higher latency networks, it would be far more valuable for frequent travelers, but for now, it will be mostly used for coffee shops in town, and eventually possibly for a vacation home.

Amplifi Teleport getting better but…

Will you kids please turn out the lights when you leave the room!

I have resisted automated lights for as long as I could.  I struggled to see the point since we have no desire to use scenes, and it has been hit or miss with getting my family to use the myriad of apps required with our home.  Even with Homekit, and the apple control panel, adoption has not been as complete as I had hoped.

A few months ago, I decided to take the leap with Lutron Caseta starter kit.  I started with my hallway recess lighting since I wanted a dimmer in both the upstairs and downstairs halls.  I chose the Lutron Caseta line because it was home kit enabled, and because my wife wanted physical switches so the traditional functionality would not be impacted.

The install was typically boring as most of my projects were.  One important thing to note is because I was replacing 3 way switches I had to do some more advanced wiring.  First of all, on the secondary switch i had to tie together, the hot, switch, and traveler wires to close the circuit, as documented here.  Since there is only one switch with a remote, I also had to purchase a wall holder for the pico remote.  Luckily this mounts behind a wall plate, and appears to be a traditional switch.  On the primary switch, I wired the traveler and the hot together as per the documentation.  The entire install took a few min.

The switches work without the hub connected, they are simple toggle switches, but once connected to the bridge, I was able to bring them up on my phone using the supplied app, or homekit.  This lead to several more dimmer switches, and then the outdoor porch lighting.  The best part of the front porch lighting was the scenes as it turned out.  I was able to tie them to turn on at sunset, and off at sunrise.  Keeping the front of the house lit up makes it less inviting for someone who might be up to no good.

The real surprise for me was when I tied the lights into our Amazon Echo.  Suddenly my family was yelling at Alexa to change lighting.  The dimmer functionality was the biggest surprise, everyone wanted to set the lights to some percentage on, and at night, telling the system to turn the lights off.  Even my wife will use Alexa to turn on the lights to a low setting when she walks out for coffee in the morning, or set the foyer light on as she walks out the door in the evenings so she doesn’t come home to a dark house.

As always your mileage may vary, connected lighting is not for everyone, and I chose traditional LED bulbs over colors because it fit our family use case.  This has been one of the more surprising projects, but I am very impressed with the Lutron brand, and the adoption by my family.

Will you kids please turn out the lights when you leave the room!

Automating my home: Mesh wireless, great but still limited

Following my previous post on installing my Ring Floodcam I started walking around my house with a friend.  Putting up one floodlight camera caused us to realize that there were many dark areas of the house, and the inadequacy of the existing outdoor cameras.  This caused me to add two more Ring Floodcams.

During the previous implementation, I had configured a separate wireless SSID because the two access points were not handing off properly.  I was continuing to get deadspots, so I thought maybe it was an issue that the Unifi AC Pro couldn’t handle.  I decided it may be time to test out a mesh wireless system.  Since I have had some good luck with Unifi’s consumer product, Amplifi I decided to test that.

Setup was insanely simple.  In less than 5 min I had my new system setup, including remote access to the controller through my google account.  I moved the “extenders” to various places in the house, but continued to struggle with slowdowns in some areas.  After a day or two of testing, I ended up returning the Amplifi devices.  Through some trial and error I found that by moving the two Unifi access points I was able to resolve my handoff issues.

Digging into this with some radio signal analysis tools, I found the major problem was the number of devices in my home.  At over 40 network connected devices before any guests join, my home network rivals a small business.

Amplifi, is a great product for most users, but in my case, it just couldn’t handle the load.  While this does not speak to all mesh wireless products, it is a challenge which will have to be overcome as more connected devices come online in more homes across the world.

Automating my home: Mesh wireless, great but still limited

Automating my home: Whole house audio with Chromecast Audio

One of the most challenging issues I have been working on for some time is whole house audio.  The largest challenge has been keeping cost low, and my family adopting the solution.  I first considered wired surround sound, but that turned into too large of a challenge, Sonos seemed like a great fit, but the cost placed that out of reach for our needs.  After significant trial and error, the latest version of the Chromecast Audio seems to have solved my concerns.

From a hardware perspective, I started with a Vizio SB3851-D0 38″ 5.1 Channel SmartCast™ Soundbar 5.1 System.  This worked well with the television, but doubled as a chromecast audio speaker.  It was good, but only in one room, and so it did not get much use for music.  Frustrated with my lack of progress, I decided to take a chance on purchasing 2 Chromecast Audio devices, with the assumption they would not work properly and I would return them.

The setup was pretty simple, I followed the instructions on the Google Home app on my iPhone.  Once the devices were joined to the network, and speakers were connected via the 3.5mm analog port, I tested them individually with Pandora, finding the sound quality acceptable for what my families needs.  This lead me to the reason for the purchase, multi-room audio.

The grouping was incredibly simple, in the Google Home App on my iPhone, and opened the device tab.

File_000 (2)

This displayed the three devices available as individual devices.


File_000

To create a new group, I simply selected the three dots on the top right of one of the devices and selected Create Group.  I selected the devices to add to the group, and now I had a new virtual chromecast audio device to send audio to.

File_000 (3).jpeg

In my case, I have 2 groups, one for the house, consisting of the living and family rooms, and one for the house + master which brings in the master bedroom.  Future plans include outdoor speakers on our back deck, garage speakers, and possibly something upstairs.

A few notes, this is great because I can keep adding more devices and creating more configurations.  The main downside is the limited number of music services, I don’t use google music or youtube red, and my spotify account is the free tier, leaving me with Pandora for the moment.  This has also lead me to think about adding a Google Home, although with an Amazon Echo and an Amazon Echo Dot, this is a tough sell at the moment just to bypass the phone for home audio.  All in, this is an inexpensive and powerful solution, provided you are not looking for some extreme high end whole house audio.

Automating my home: Whole house audio with Chromecast Audio

Automating my home: Ring Floodlight Cam

After installing the Ring Doorbell Pro, Automating my home: Ring Pro Video Doorbell, I wanted to mount an outdoor camera on the front of my house to get complete coverage.  My wife was ok with it, provided that it didn’t look like a camera, or was well hidden.  After some fuming about how challenging that would be, I found the Ring Floodlight Cam.

I just so happened to have a motion sensor floodlight on the front of the house, so I bit the bullet and expanded my security footprint.  The biggest challenge on this was the 110 volt connection, or more specifically the fact that the wiring was 18 feet above my driveway.  I am a fairly good handyman, but I do not like heights, so it was not fun to install.  Once I finally found the correct breaker to turn off the power, it is on my list to label them, the install was pretty straight forward.  It was literally as simple as disconnecting the old light, and connecting this one, ground, neutral, and hot, then the screws to attach it, and power back on.

I thought I was done, until I tried to setup the wireless for the camera, which showed me that my single Unifi UAP AC Pro access point wasn’t quite enough for the house.  Amazon prime will have the new one here soon, but in the mean time, I used an old airport express and connected the Floodcam to it.

The only real complaint is the alerts, my wife is going to be turning off all the motion sensor alerts, I prefer to get them, I adjusted the motion area to cover my driveway only.  The adjustment from our perspective is when someone walks up our drive way to the front door.  The Floodcam alerts, then the doorbell, and if someone rings the doorbell, well that is three alerts.  It is not bad, but it does take some getting used to.

After this latest install, I have to be honest, I am a bit of a fanboy.  These have been the easiest products to install and maintain, and the performance is incredible for the size.  With live view, I can check in on my house and neighborhood when I am away from home, and with the cloud storage, I can provide the video to law enforcement if there are any suspicious people near my house.  I am still waiting on the Ring Stickup Camera to come out in 1080p video, then I will likely go with an all Ring system.  I can’t recommend these enough, by far my favorite security and camera products yet.

Automating my home: Ring Floodlight Cam

Automating my home: Ring Pro Video Doorbell

I have been very opposed to video doorbells for sometime now, it just seemed like an odd place to put a camera, and I couldn’t find one with live video stream, most operated based on the doorbell being run, and more recently on motion, but I wanted to be able to use it as a traditional camera.  I was also a little concerned by the original model requiring recharging and whether I would remember to actually charge it. Recently, my wife mentioned that she was surprised we didn’t have one, and it seemed like a good idea.  With the release of the Ring Video Doorbell Pro, and the live stream update, I decided to jump in and give it a shot.  The worst case I could always return it, but I had high hopes.

The packaged arrived, and of course I could hardly wait to get it opened and take a look.  Installation was a little disappointing, only because it was so simple.  My youngest son removed the old doorbell, and we took off the 24v wires, connected them to the new doorbell, and attached it to the house.  The app walked me through connecting the device to wifi, and we tested it.  The only problem we found was the mechanical chime only rang once, rather than twice as before.  Reading the directions quickly, it appeared that there is a “pro power adapter” which we needed to install in the chime itself.  Again this was almost disappointingly simple.  Once I wired it in, everything just worked.

It has only been a few hours, but I am impressed with the quality of the video, the ease of use, and the simple integration.  I have invited my wife to create an account, so her testing will be important to make sure it is successful.  I also dug out an old iPhone 5 which I locked down to basically the Ring App.  I am planning to mount it in a common area, so we don’t lose functionality.  I would love to see an Apple TV and Roku apps, but those would be tough since it is there is no way for two way audio yet.

Installing this has me considering the Ring Stickup Camera.  The simplicity of the app, and the impressive web interface would make it a perfect fit.  My two hesitations are the 720p camera, and again the battery.  On the cameras, I could deal with the battery, but to replace my 4 Samsung Smartcam HD I want 1080p video.

This is an absolutely impressive product, I am looking forward to seeing what more Ring brings to market.  I am going to experiment with Stringify or IFTTT next to see what new integrations I can do.

Automating my home: Ring Pro Video Doorbell

Updating the Raspberry Pi Unifi Controller to 5.4.16

With the recent release of UniFi’s 5.4.16 controller software, the Java version has been updated to version 8.  On the Raspberry Pi controller, this causes the controller to fail to start after the upgrade.  After some digging on the forums, it seems to be a common problem, but easily resolved.

Upgrade:

To upgrade, it is a simple update command if you followed my previous post on Building a Unifi Wireless Controller with a Raspberry Pi 3.  The upgrade is simply as follows.

sudo apt-get update && sudo apt-get upgrade -y

Fix the issue:

To resolve the issue with java, you will need to first make sure you have Oracle Java 8 installed.
sudo apt-get install oracle-java8-jdk

Then make sure the new version is set as default.

sudo update-alternatives --config java

Select Oracle Java 8.

Restart the service.

sudo systemctl restart unifi

This is a very simple fix, but hopefully this saves some frustration on configuring your Raspberry Pi 3 UniFi controller.

Updating the Raspberry Pi Unifi Controller to 5.4.16

To home lab or not to home lab

As I often do, I am again debating my need for a home lab.  My job is highly technical, to take technology architecture and tie it all together with the strategic goals of my customers.  Keeping my technical skills up to date is a full time job in and of itself, and begs the question, should I build out a home lab, or are my cloud based labs sufficient.

One of the perks to working at a large company is the ability to use our internal lab systems.  This can also include my laptop with VMware Workstation or Fusion product which affords some limited testing capabilities, mostly due to memory constraints.  Most of the places I have been have had great internal labs, demo gear, etc, which has been nice.  I have often maintained my own equipment as well, but to what end.  Keeping the equipment up to date becomes a full time job, and adds little value to my daily job.

With the competition in cloud providers, many providers will provide low or no cost environments for testing.  While this is not always ideal, for the most part, we are now able to run nested virtual systems, testing various hypervisors, and other solutions.  Many companies are now providing virtual appliance based products which enable us to stay fairly up to date.

Of course one of my favorites is VMware’s Hands on Labs.  In fairness I am a bit biased, working at VMware, and with the hands on labs team as often as I can.  Since a large majority of what I do centers around VMware’s technology, I will often run through the labs myself to stay sharp on the technology.

While the home lab will always have a special place in my heart, and while I am growing a rather large collection of raspberry pi devices, I think my home lab will be limited to smaller lower power devices for IoT testing for the moment.  While always subject to change, it is tough to justify the capital expenditure when there are so many good alternatives.

To home lab or not to home lab