With VMware Tanzu becoming more critical to the VMware Strategy, I thought I would see what it is like to install in my lab with out any experience on this specific product. I plan to write a few more posts about the experience and how it relates to VMware Cloud strategy. As a disclaimer this was done with nested virtualization, so this is not a performance test. William Lam wrote a post on an automated deployment, but I wanted to have a better understanding to share. To get myself started I watched Cormac Hogan’s video on the implementation.
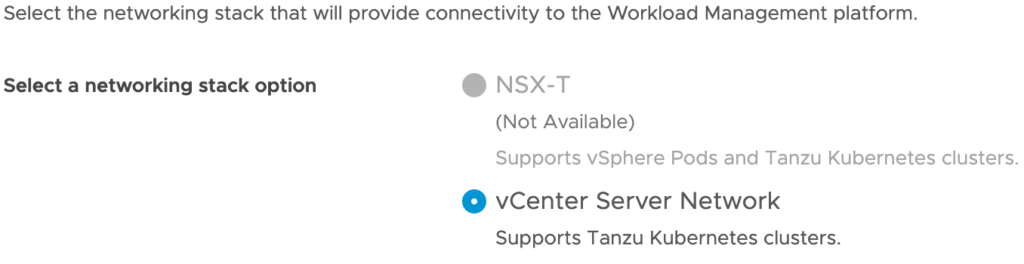
Assuming the prerequisites are met which is covered in several youtube videos and other blogs, start with selecting “Workload Management” from the main menu in the vCenter web client. The initial choice is allows you to select NSX-T, if installed, or you will need to use HAProxy for the vCenter Network.
On the next screen, select your cluster, next and then choose your control plane size. For a lab deployment Tiny should suffice, depending on how many workloads to be deployed in the environment. On the next screen choose your storage policy, in my lab I am using vSAN to simplify things.
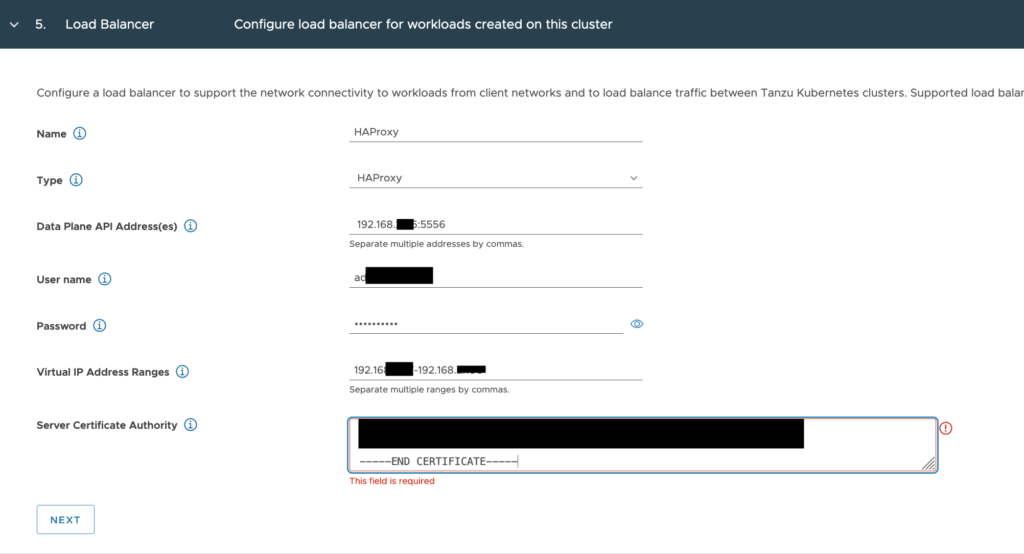
For the Load Balancer section, you just need to give it a name, something simple works and select HAProxy as the type. The Data Plane API Address is the IP of the HAProxy you setup, with a default port of 5556. Put in the username and password you put in when setting up HAProxy. The Virtual IP Address Range you should pick something in the workload network, separate from the management network and something not in the DHCP scope.
In the “Server Certificate Authority” you will need to SSH into the HAProxy VM, and copy the output of “cat /etc/haproxy/ca.crt” into the field.
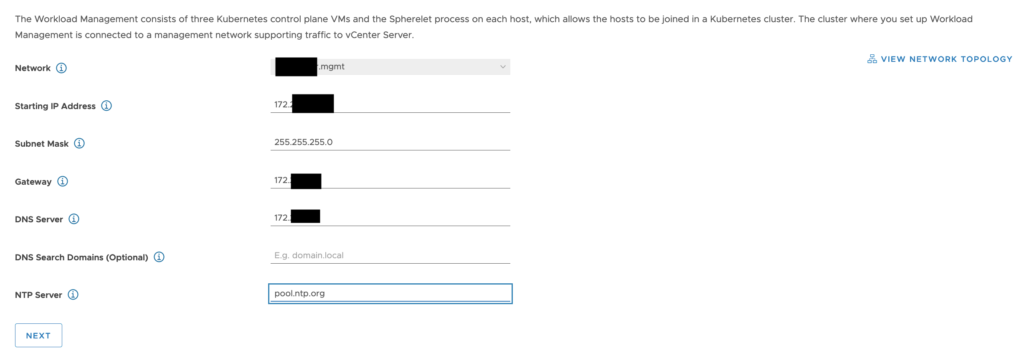
In the workload management section, select the management network being used for the deployment. Input the network information including the start of the IP range you want to use.
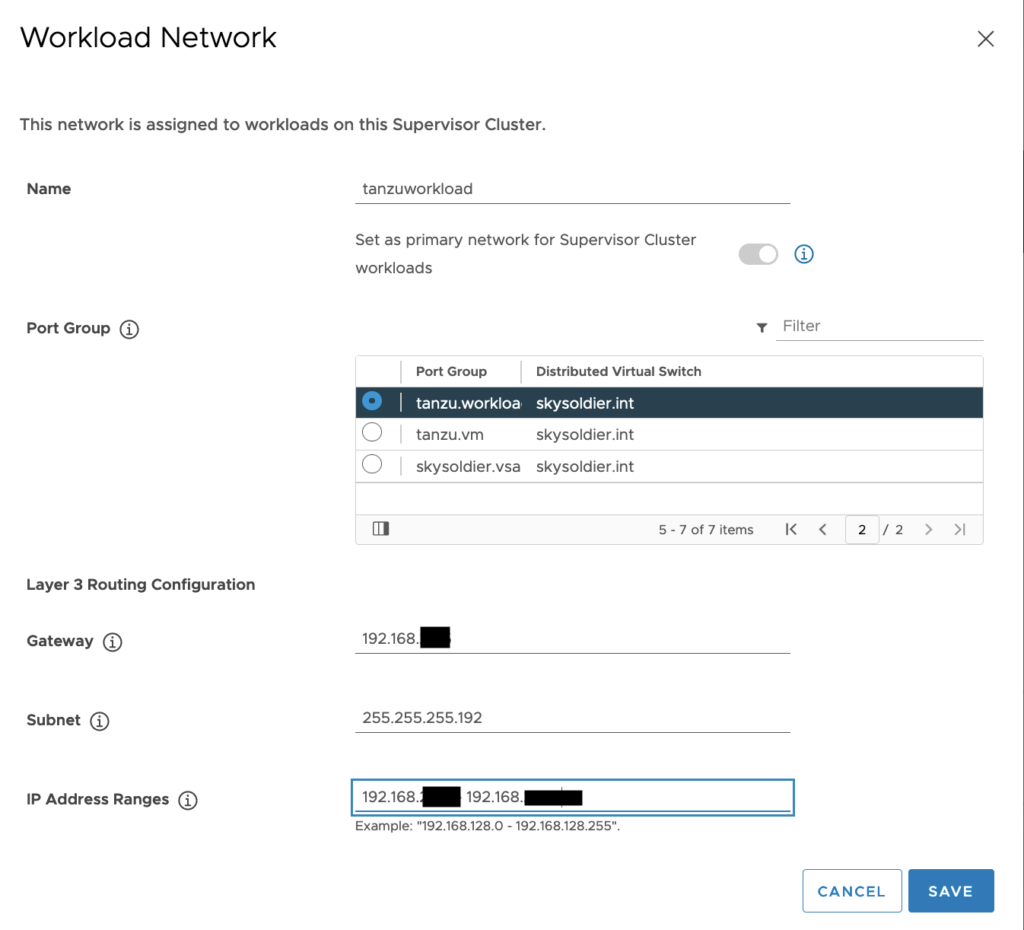
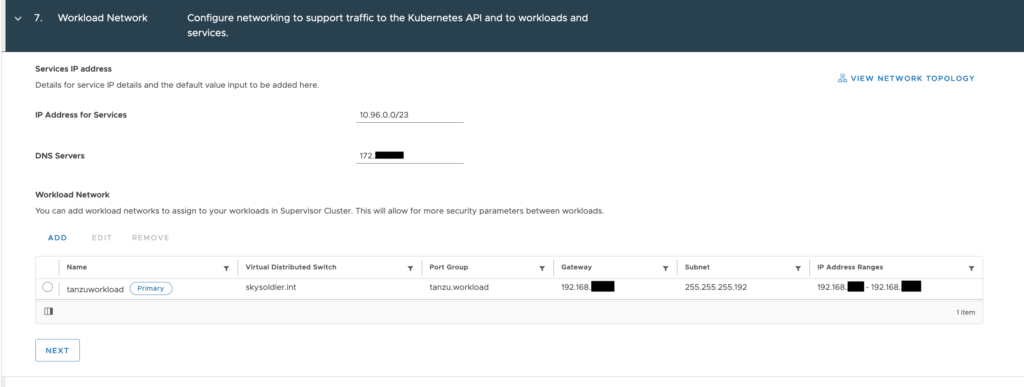
Under the workload network, select your workload network and fill in the information. This should be on a separate broadcast domain from the management network.
For the Service Network pick something that is not conflicting with your existing networks, and at least a /23 range. Add your workload network from the previous screen below.
Finally select the content library you should have subscribed to already, and finish. It will take some time to provision and you can then provision k8s workloads natively in the vSphere environment.
A couple thoughts on this, the install wasn’t too bad, but it did take a while to understand the networking configuration, and setup everything correctly. I had also assumed this would be a little more like VMware Integrated Containers. While I have some understanding of deploying workloads through k8s, installing it is a bit more learning. The next steps for me are go through the deployment a few more times, and then start testing out some workloads running.
For those of us coming from the Infrastructure side of things, this is going to be a great learning opportunity, and if you are up for the challenge, Kube Academy is an exceptional, and no cost resource to learn from the experts. For those who do not have a home lab to work with, VMware also offers a Hands on Lab, for vSphere with Tanzu at no charge as well.