 Previously I talked about my Unifi wireless configuration. A critical part of ubiquity’s wireless is the controller. In a traditional home wireless configuration, the router, wireless access point, controller, and often a small switch are all built into the same device. This makes the system simpler, but far less powerful and flexible.
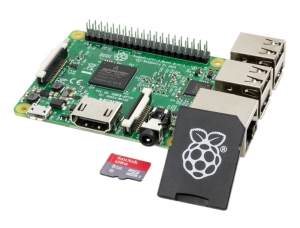
As I was exploring my options, I originally put the controller software on my mac mini we use as a media server. This caused some issues with port mapping since it uses port 8080 and 8443. One of my other media management products used port 8080 so I started looking for another solution. I tried following the documentation, which entailed building MongoDB, a painstaking process on an arm processor, so I opted to install the Debian package from the Ubiquity website. Pretty simple, but here are my lessons learned, and some quick shortcuts to get it done. As a side note, this seems to work on a Raspberry pi B+, but the performance is pretty spotty. The Raspberry pi 3 B+ is much more suited to the task.
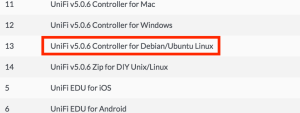
The first step is to install the latest version of raspian. I opted for the “lite” version since I have no need for the desktop interface. Once you boot up and go through the basic setup, including the wifi configuration, you will need to grab the latest package from the the Ubiquity site, https://www.ubnt.com/download/unifi/. Make sure you grab the debian package as noted here.
Installing the package is pretty straight forward. SSH into the Raspberry PI and run the following after you download the software.
sudo dpkg -i unifi_sysvinit_all.deb
This should return several errors. To fix this, run the following commands.
sudo apt-get install -f
sudo dpkg -i unifi_sysvinit_all.deb
The second run of dpkg may or may not be necessary, but I like to be thorough.
Once that is done, simply open a browser on your computer and go to http://<raspberry pi ip>:8080. It will walk you through a pretty simple setup, and voila, you are done.
I did look at the cloud key, but for the extra cost, the reviews didn’t seem positive. At the cost of the Raspberry PI it is a simple and cost effective controller with minimal setup/maintenance.

[…] Building a Unifi Wireless Controller with a Raspberry Pi 3 […]
[…] upgrade, it is a simple update command if you followed my previous post on Building a Unifi Wireless Controller with a Raspberry Pi 3. The upgrade is simply as […]